Yaskawa Robot
Note: In addition to the setup information below, refer to the video lesson (in English) on the Visual Components Academy.
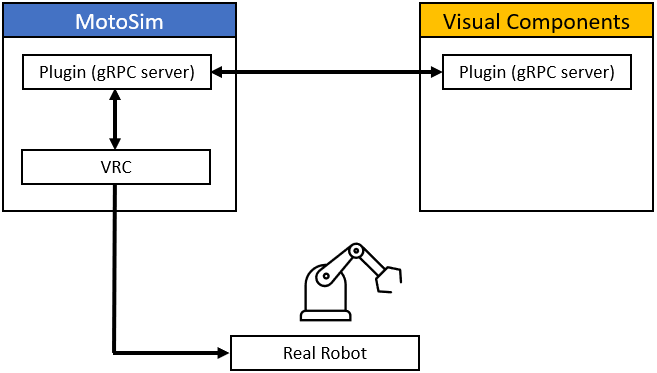
About the plugin
The connector supports a direct connection to a virtual Yaskawa robot controller (VRC) running in MotoSim. A connection to a real robot is created via a network connection in MotoSim. MotoSim and Visual Components will in most cases be running on the same computer. However it is possible to run Visual Components on one computer and connect to the IP address of another computer running MotoSim.
The connector supports the following actions:
- Connection to one or more Yaskawa robots at a time.
- Reading of joint values.
- Reading of external inputs, external outputs and program variables.
- Writing external inputs and program variables.
Terminology
- API (Application Program Interface).
- gRPC – (Remote Procedure Call) framework.
- IO (Input/Output).
- JBI – program files for the Yaskawa/Motoman robot controller.
- MotoSim – Yaskawa MotoSim EG-VRC (Enhanced Graphics Virtual Robot Controller) simulation software.
- SLURBT – terms that Yaskawa/Motoman uses to describe each axis of the robot for convenience. The definition of each value is as follows:
- S Axis: Swivel Base (Swivel Base)
- L Axis: Lower Arm (Lower Arm)
- U Axis: Upper Arm (Upper Arm)
- R Axis: Arm Roll (Arm Roll)
- B Axis: Wrist Bend (Wrist Bend)
- T Axis: Tool Flange (Tool Flange)
- E Axis: External Axis or Seventh Axis (External Axis or Seventh Axis)
- VRC (Virtual Robot Controller).
- YRC1000 – Yaskawa controller platform.
Requirements
The connection requires Visual Components Premium 4.10 and the MotoSim plugin available from visualcomponents.com/downloads.
Setup
Note: In addition to the setup information below, refer to the video lesson (in English) on the Visual Components Academy.
In terms of technology, a MotoSim plugin is used to communicate with Visual Components. The connection uses MotoSim VRC API created by Yaskawa and gRPC. Therefore, MotoSim is required to connect with a robot.
Installing the MotoSim plugin
To install the Yaskawa MotoSim plugin, run the installer.
To uninstall the Yaskawa MotoSim plugin, run the uninstaller available from the following path:
C:\Users\Public\Documents\MOTOMAN\MotoSimEG-VRC\Plugins\x64\uninstaller.exe
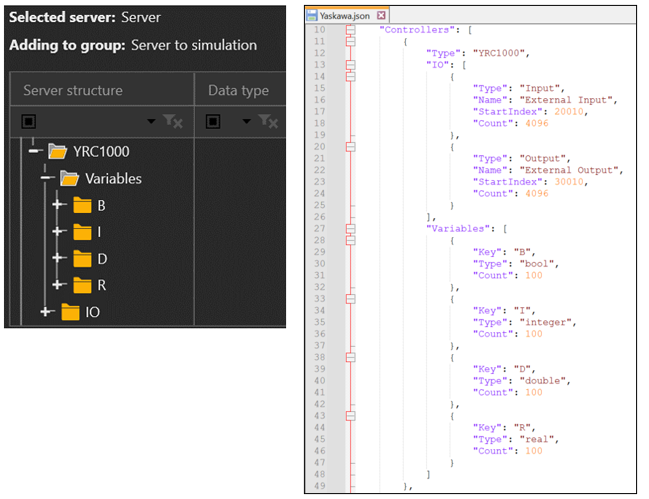
The plugin is added to the Plugins folder of your MotoSim public documents and includes a Yaskawa.json configuration file used for identifying the IO and variables of a Yaskawa controller, for example YRC1000.
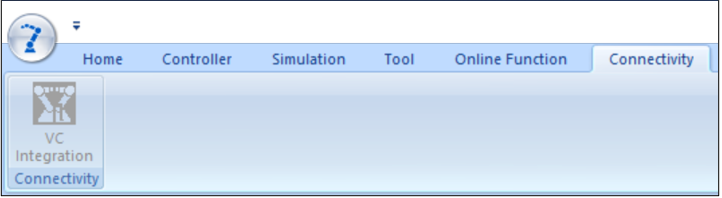
After installing the plugin, run MotoSim and confirm the plugin is available in the Connectivity tab.
Using the MotoSim plugin
Open your MotoSim project. Then use the MotoSim plugin to define a Port number and start the connection. You can now connect Visual Components to the robots in your project.
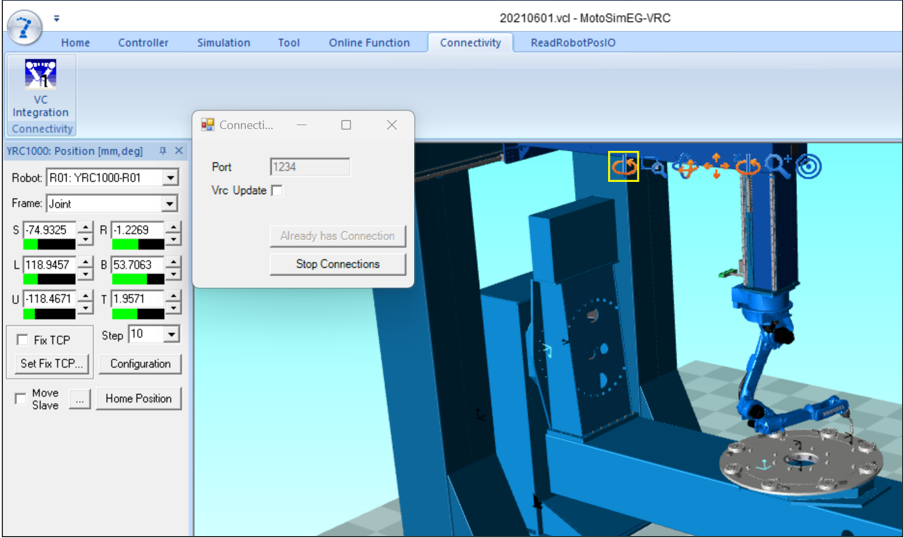
Note: In most cases, it is recommended to keep the Vrc Update property unchecked, especially when MotoSim is connected to a real robot.
Connecting to Robot
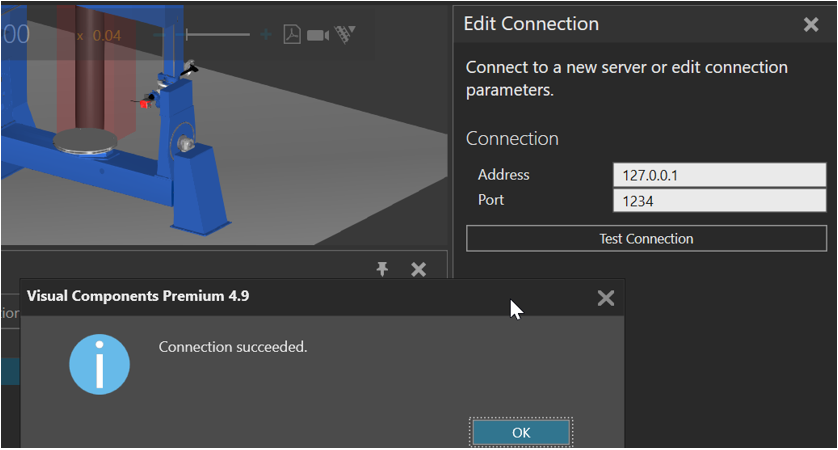
When connecting to a robot, use the correct IP Address and Port number.
Mapping Variables
The Movement, IO and Variables folders for each connected robot contain the variables for joint values, IO, and variables used in Yaskawa programs.
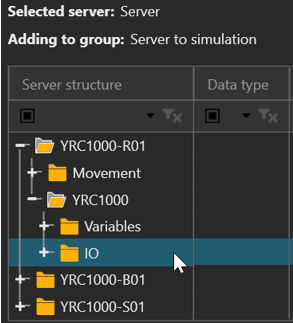
The available IO and program Variables are based on the connected robot and its controller, which is defined in the Yaskawa.json configuration file. Make changes to the configuration file as needed for your projects.
Compatibility
About Movement variables
In MotoSim v2022 there is a known issue where the joint values of the controller do not correspond to the joint values in the Position panel. The robots in Visual Components are modeled to respect controller values. As a result, the robot movements in your Visual Components projects might not match those in MotoSim, since the joint values are read from MotoSim.
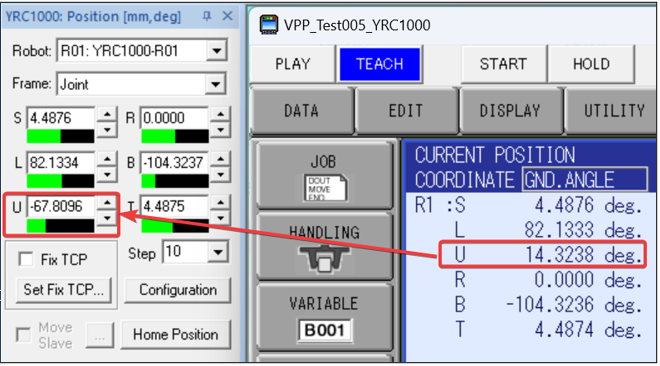
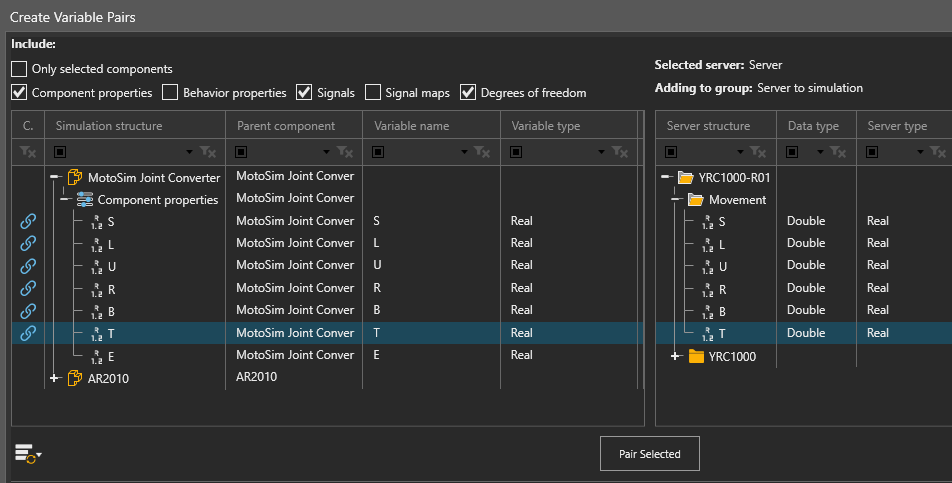
The MotoSim Joint Converter component in the eCatalog is a tool you can use as a workaround for this issue.

First, using the Interfaces tool, remotely connect the robot in Visual Components to the MotoSim Joint Converter component in your layout.
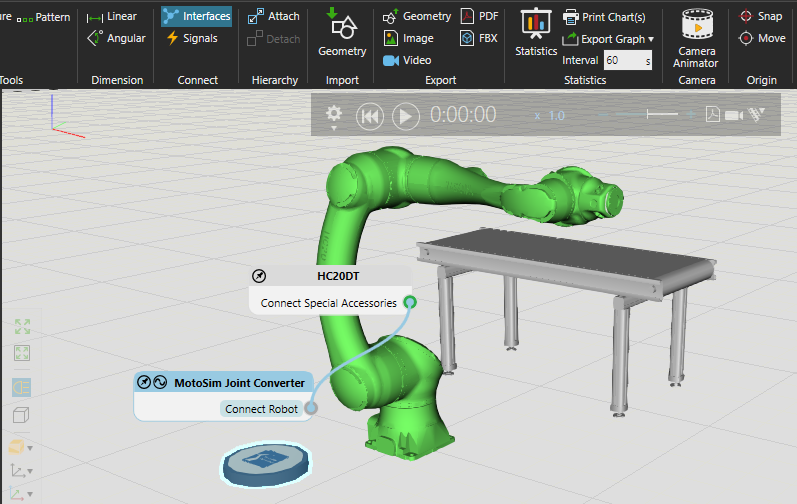
Next, map the movement variables of the connected Yaskawa controller to the SLURBT properties of the MotoSim Joint Converter component.
Postprocessing the Robot Program
Postprocessor
If you need to translate robot programs from your Visual Components model to the native controller, you can use the Postprocessor.
Note: The Postprocessor is available in the following products:
- Visual Components Premium
- Visual Components Premium OLP
- Visual Components Professional OLP
- Visual Components Robotics OLP
For more information on postprocessing using a Visual Components OLP product, see Translate robot program.
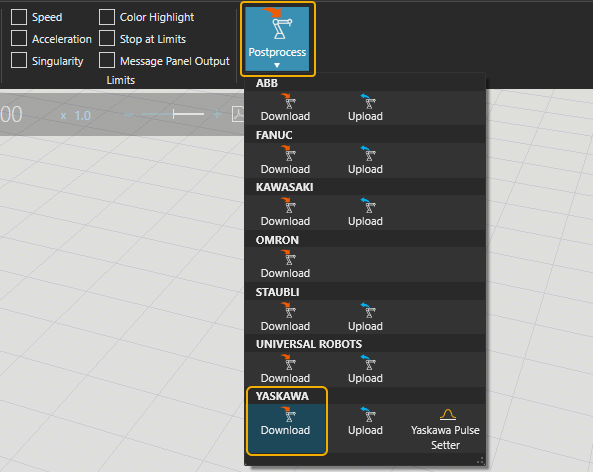
To translate the robot program for the real robot controller:
- Click the robot (or another device) which program you want to translate.
- Click Postprocess from PROGRAM ribbon tools.
- Click Download under the correct robot brand name.
- Browse the folder where you want to save the program file and give name for the file.
-
Click Save.
The file can be transferred to the robot controller
Note: In real robots, run only the robot programs that are translated from calibrated models. Otherwise, there can be unpredictable collisions and errors when executing the program.
Yaskawa Pulse Setter
The Yaskawa Pulse Setter is required to set the pulse ratios on a Yaskawa robot model. By default robot positions in JBI programs are defined as pulse values. Therefore the simulation model requires the correct pulse ratios.
Note: The Yaskawa Pulse Setter is available in the following products:
- Visual Components Premium
- Visual Components Premium OLP
- Visual Components Professional OLP
For more information check the Visual Components Robotics OLP robot brand specific manuals on the Visual Components OLP Extranet.