MQTT Client
About the plugin
The MQTT Client allows you to connect to an MQTT broker. More specifically, topics can be subscribed to and messages can be published into topics.
Terminology
- Topics — Channels of different messages within an MQTT broker. One topic typically has only one type of message.
- Broker — Facilitator component of MQTT communication that receives messages and sends them to all clients that have subscribed to that topic.
- Subscribe — A client can subscribe to a topic. After this, the broker sends all messages in that topic to all subscribers.
- Publish — A client can publish a message into a topic. After that, the broker resends that message to all subscribers.
- QoS — Quality of Service.
Setup
Access to a running MQTT broker is required to complete the following steps.
-
Connecting to an MQTT broker
- Connection information
- Host: Address of the MQTT broker.
- Enter the address without “mqtt://” prefix
- Port Number
- Host: Address of the MQTT broker.
- Select Authentication to enter the username and password for the broker if required.
- If the broker authentication requires using a specific MQTT client ID, under Advanced options, select Enable Custom and add the Client Id (Optional).
- Click Test Connection.
- Click Save.
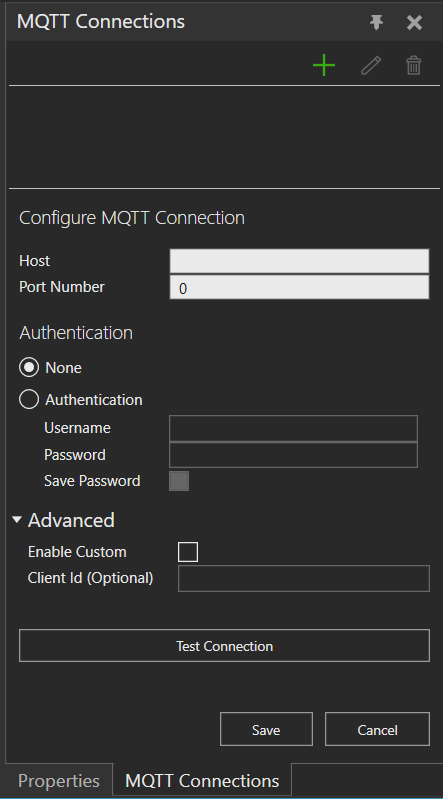
- Click the Connect/Disconnect button.
- Connection information
-
Adding topics
- Click Sub/Pub from the ribbon above to open the MQTT Messages panel.
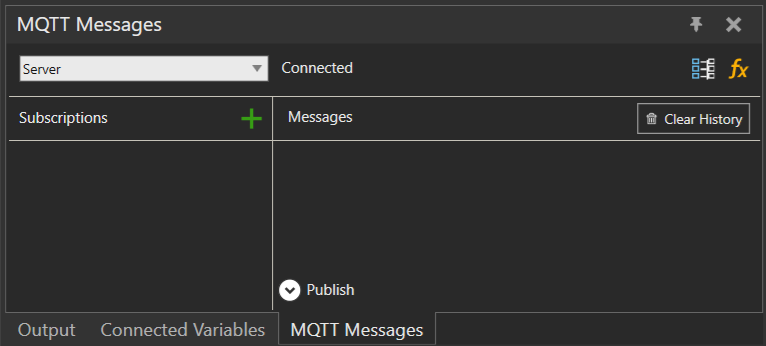
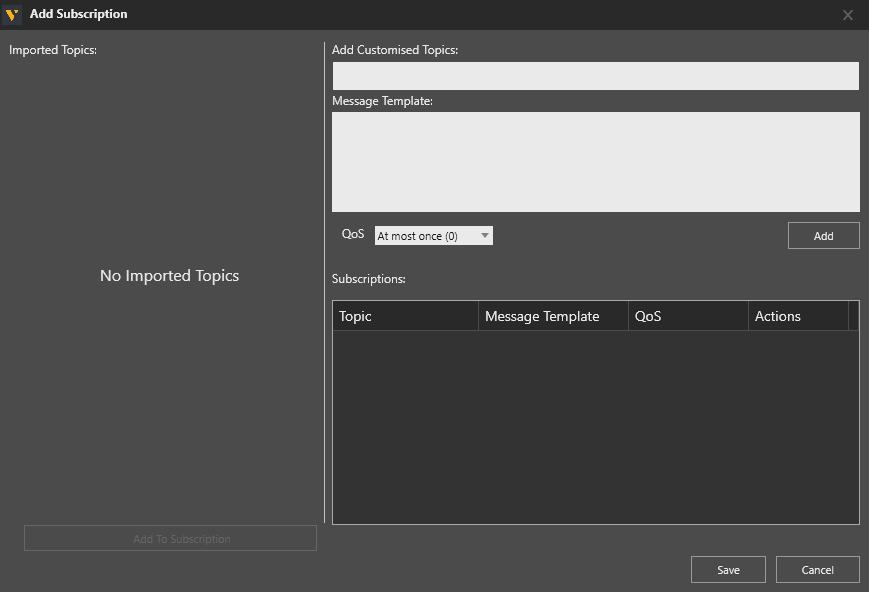
- Click + to add new topics. This opens the Add Subscription editor.
- In Add Customized Topics define the topic name.
- An optional Message Template in JSON format can also be defined. This supports the pairing of variables inside the message object with different simulation variables.
Note: Refer to the Other Notes section below for syntax examples. - Set the desired QoS level. By default the level is At most once (0).
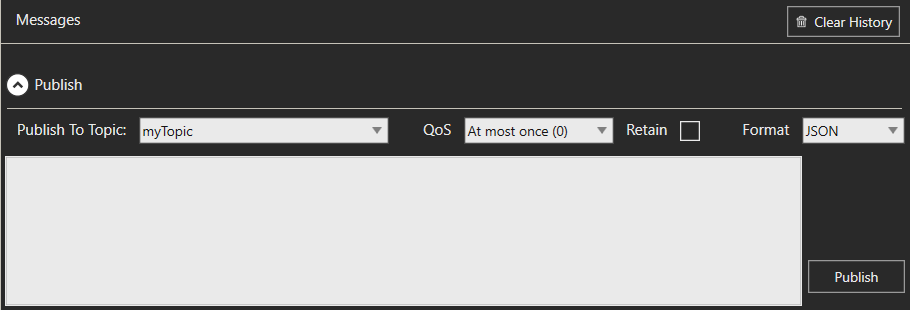
Note: To test publishing a message into a topic without pairing variables, expand Publish and type the message content.
- Click Sub/Pub from the ribbon above to open the MQTT Messages panel.
-
Pairing variables
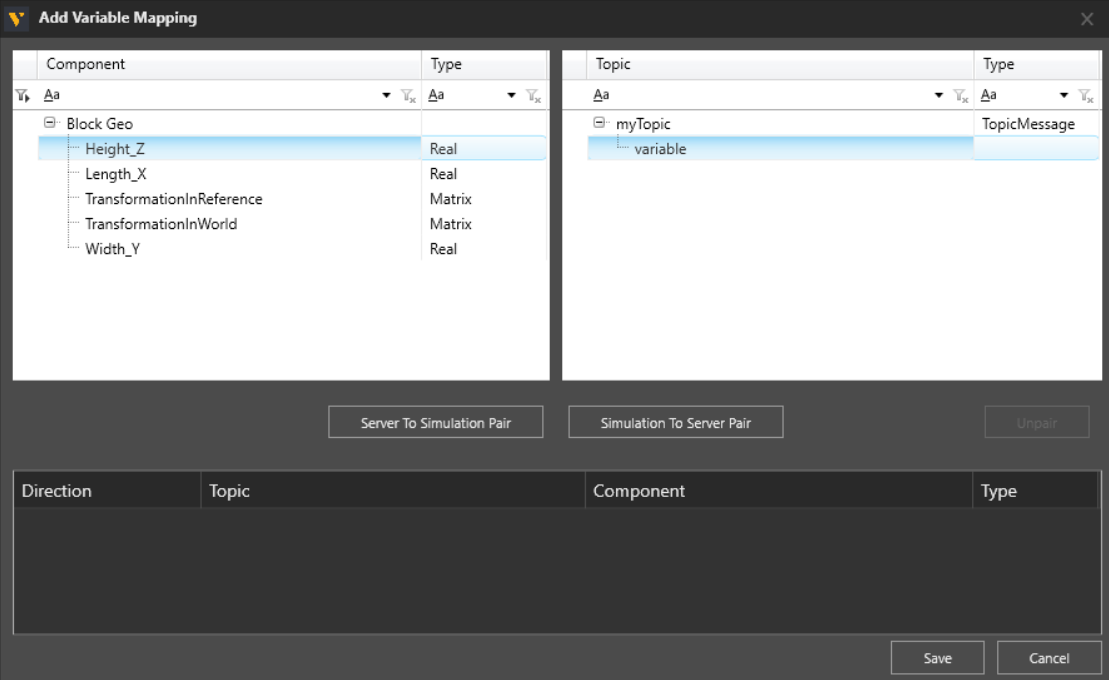
- Open the Add Variable Mapping editor.
- Use the search bar or filter function to find a specific variable.
Note: If pairing the component position is required, use position properties TransformationInWorld and TransformationInReference. - Pair the properties or signals on the left with messages or variables inside the message template on the right.
-
Defining formulas
This step is required only when a variable pair requires conversion or calculations. In the Variable Formula Editor an expression can be defined to convert the message contents into the desired format.
Note: Refer to the Other Notes section below for syntax examples.
SimulationToServer variable pairs contain an Is Trigger? property, which defines if a change in the variable value will trigger the publishing of a message.
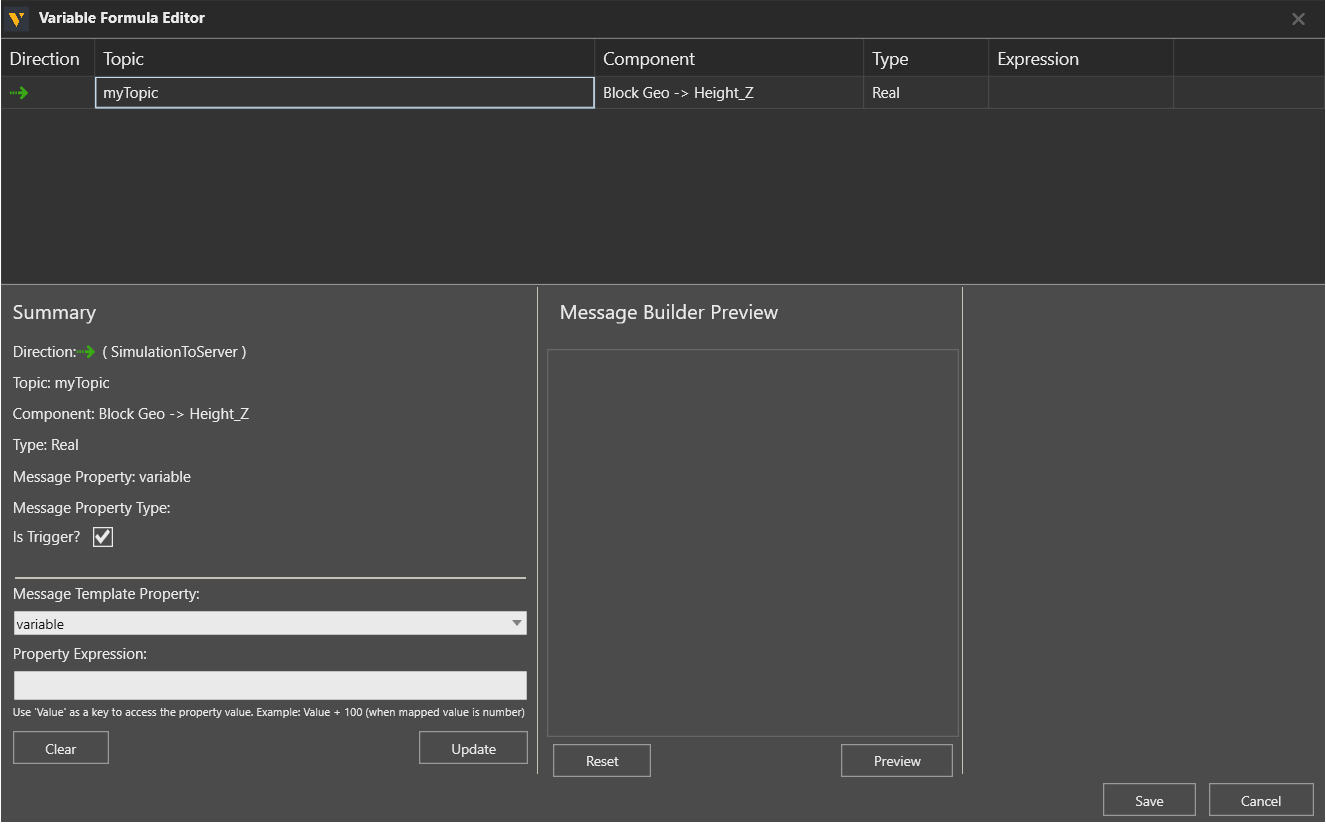
In expressions for SimulationToServer variable pairs, the current value of the property or signal can be accessed with keyword Value.
In expressions for ServerToSimulation variable pairs, the value of the variable in the MQTT message can be accessed using dot notation and the keyword Payload.
Note: Refer to the Other Notes section below for syntax examples.
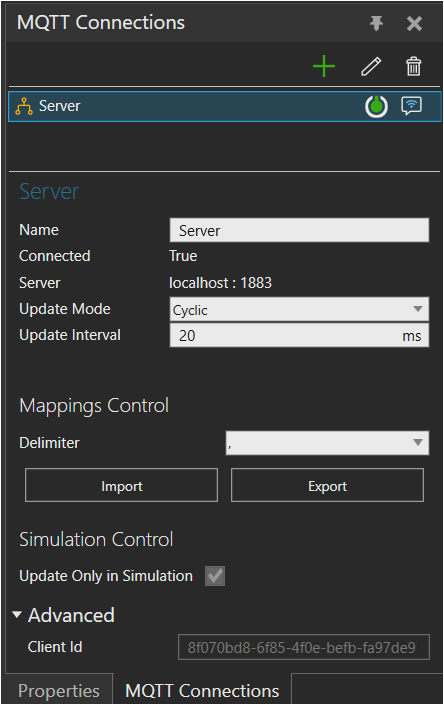
Connection Settings
- Update Mode: Cyclic or Event-based.
- Cyclic update mode: Update Interval limits the rate of messages sent and received.
- Event-based update mode: Messages are always sent when a triggering property changes value. All received messages are processed immediately.
- Mappings Control: Export or Import topic definitions and variable pairings in .CSV format.
- Simulation Control: Update Only in Simulation defines if updates occur only when the simulation is running. To set this as False, Update Mode must be Event-based.
- Advanced: Client Id sets the identifier used by the MQTT Client when connecting to a broker.
- Advanced: Record Messages The messages are saved in text files, one per topic and MQTT Client session. The files are saved in:
C:\Users\%username%\AppData\Local\Visual Components\%version%\Plugins\MQTT\Messages
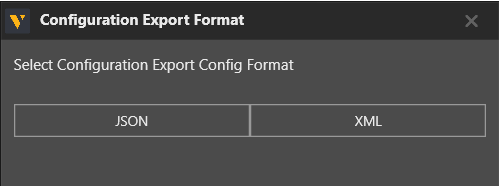
Editing or exporting configuration
Using Configure in the ribbon above, the MQTT connectivity configuration can be opened as a JSON or XML file to edit or export the configuration. The file opens in the default text editor on the PC. Changes to the configuration file are applied after saving the file and closing the text editor.
Error handling
- Message templates are validated once they are added.
- If a received message contains variables that are not in the message template, the message is still processed.
- If a received message is missing variables defined in the message template, the simulation variables paired with the missing message variables are not updated.
- Expressions are validated once they have been added using the Update button.
- If an expression refers to a message variable that is missing from a message, the simulation variable is not updated.
Limitations
Wildcard topic subscription using single-level or multi-level symbols (+, #) is not supported: only specific topics can be subscribed.
Variable pairs cannot be formed directly with objects that are located inside an array in the message template. The contents of arrays are hidden in the Add Variable Mapping editor. To map a variable located inside an array with a simulation variable, use expressions in the Variable Formula Editor to read the value from the received message or to construct the array for a published message.
Note: Refer to the Other Notes section below for syntax examples.
Compatibility
MQTT protocol versions v3.1.0 and v3.1.1 are supported.
The connection has been tested with brokers that have port numbers 1883 or 8883.
Supported data types
The MQTT Client supports access to variables present in MQTT messages. When using a message template, the message is in JSON format.
| JSON Type | VC PROPERTY TYPE |
| Array | VC_BOOLEAN/VC_REAL/VC_STRING/VC_MATRIX*/VC_VECTOR** |
| Boolean | VC_BOOLEAN |
| Number | VC_INTEGER***/VC_REAL |
| String | VC_STRING |
* An array with 6 numeric values is interpreted as a translation and rotation matrix (X, Y, Z, Rx, Ry, Rz).
** An array with 3 numeric values is interpreted as a vector in a server-to-simulation pair. A vector in simulation-to-server pair is published as a JSON object with 6 values: X, Y, Z, W, length, and length squared.
*** Number variables are automatically rounded if they are paired with integer properties or signals.
When message template is not used, message payload must use a JSON type. String-type payload must be wrapped in quotes.
Other Notes
The following are example expressions used in the Variable Formula Editor.
Expressions for subscribing:
Convert coordinate message { "x": 100.0, "y": 200.0, "rz": 90.0} into a position matrix:
| @Array(Payload.x, Payload.y, 0, 0, 0, Payload.rz) |
Pick first element of array in message { "jointValues": [0.0, 20.0, 90.0, 0.0, 0.0, 0.0]}:
| Payload.jointValues[0] |
Pick element “value” in second element of array in message { "array": [{"id": 10, "value": 1.0}, {"id": 11, "value": 3.0}]}:
| Payload.array[1].value |
Convert the received message into a string:
| Convert.ToString(Payload) |
Expressions for publishing:
Pick Rz coordinate of component’s world position:
| Value[5] |
Convert a position matrix into message { "x": 0.0, "y": 0.0, "rz": 0.0}:
| @Object(@Pair("x", Value[0]), @Pair("y", Value[1]), @Pair("rz", Value[5])) |
Convert value of a string property into JSON:
| @Json(Value) |